
Are you ready to take your Next.js application to the next level and tap into a global market? If you’re looking to cater to users in multiple languages, it’s time to explore the powerful capabilities of next-translate. In this guide, we’ll walk you through the precise steps required to seamlessly translate your Next.js project.
Before diving in, the first crucial decision is to determine the optimal approach for your Next.js application. We’ll tackle two essential tasks: efficiently managing JSON locales and effectively maintaining separate URLs. With Next.js version 10.0.0 and beyond, you have built-in support for internationalized routing, offering two prominent proposals: Sub-path Routing and Domain Routing. To dive deeper into these techniques, refer to the official documentation linked below. However, for this tutorial, we will focus exclusively on the highly effective sub-path routing method.
Start with configurations
First of all, we need a next-translate package, install it with npm install next-translate, create an i18n JSON file in the root of the project and add your languages, check my example from the image, I will use stackblitz to create this tutorial and I will add the link of the project at the end of the article.

I added few things in the i18n file, locales it’s an array with the languages you want to have in your project, in my case “ro” it’s for Romanian and “en” it’s for English. I set up defaultLocale to “ro” to be the default language for my project, you can set it to be your native language.
As a small observation is to check which language is set on the browser, the project will be translated first time in the browser language.
The last thing from the i18n file is pages, an array that contains the name of files with the translations for each page. I this tutorial I added just one file common to have the same examples.
Create locales folder in the root of the project with languages you set up in the i18n file:

Add next-translate package to next.config.js:
const nextTranslate = require('next-translate');
module.exports = nextTranslate();
If you already have configurations in your next.config.js file you need to wrap all the configurations into next-translate module:
const nextTranslate = require("next-translate");
module.exports = nextTranslate({
  env: {
    REACT_APP_API: "http://localhost:3000",
  },
  eslint: {
    ignoreDuringBuilds: true,
  }
});
To summarize, add i18n.json file in the root of the project with your configurations and install next-translate package, create locales folder with languages and add common file name as JSON and import next-translate into next-config.js in order to load all configurations.
Translate pages
In our common.json file, we need to add some attributes, for example, if we decide to translate our title we should add it in both places locales/en and locales/ro:
// en
{
  "title": "Welcome to our translated page"
}

// ro
{
  "title": "Bine ati venit"
}
The next step we should do is to get our translated title on the Home page:
import useTranslation from 'next-translate/useTranslation';

//use into component
const { t, lang } = useTranslation('common');
const title = t('title');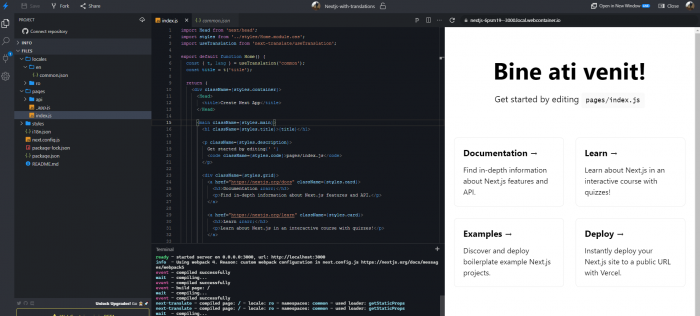
As you can see my title is translated in my native language, in this case, next-translate module works perfectly.
Create language switch component ( bonus )
I’ve create also a component for switching our language, we set up the name of languages in common.json files, and then we can extract them in the component.
I used react-bootstrap to create the dropdown, you can use any other UI framework or you can build your own dropdown.
import React from 'react';
import { Dropdown, DropdownButton } from 'react-bootstrap';
import i18nConfig from '../../i18n.json';
import useTranslation from 'next-translate/useTranslation';
import Link from 'next/link';

const SwitchLanguage = () => {
  const { locales, defaultLocale } = i18nConfig;
  const { t, lang } = useTranslation('common');

  return (
    <div>
      <DropdownButton id="dropdown-basic-button" title="Switch Lang">
        {locales.map(lng => {
          if (lng === lang) return null;
          return (
            <Dropdown.Item key={lng}>
              <Link href="/" locale={lng} key={lng}>
                {t(`common:language-name-${lng}`)}
              </Link>
            </Dropdown.Item>
          );
        })}
      </DropdownButton>
    </div>
  );
};

export default SwitchLanguage;
As you can see in the code I’m extracting the languages from common:language-name and locales. You can find more documentation on the official package next-translate.
Here you can find the final code: https://nextjs-6psm19.stackblitz.io